

How I Mastered This Move: The Tuck Balance

What is a Tuck Balance
Arm balancing, hand balancing, handstands, inversions: there are many names for balancing on your hands. While most people think of a handstand as the end all be all, in Animal Flow we focus on a very specific type of hand balance called a Tuck Balance. As the name implies, a Tuck Balance is a bent leg position where the knees are pulling towards the chest, versus a handstand where the legs are fully extended with toes pointing directly towards the sky.
Why a Tuck?
We chose the Tuck Balance as the official hand balance of AF because we can get in and out of it while still maintaining the fluidity of our flow. For me personally, I quite like the lines and aesthetics of a TB, which gives this position both form and function. From here on out, when we use the phrase “hand balancing” we’ll be referring to the Tuck Balance, although many of the suggestions I’ll be offering would be very similar, if not exactly the same, as for handstand training.
Why is it so hard?
Whenever I begin a workshop that focuses on hand balancing, I pose a simple question: “Why can’t everyone balance on their hands?” After a pause, the students will start offering various answers that range from muscle mass and strength, to gender and mindset, but inevitably someone will eventually yell out, “because it’s hard!” Bingo! It IS hard, and it’s hard for many reasons, but a good place to start is to look at the way we’re designed.
Your anatomy is not in your favor.
Go ahead and take a glance at your feet. They are immaculate in their design. They are robust and sturdy enough to allow you to walk and run on them for long durations, but at the same time nimble and pliable enough to deal with changing surfaces. The length of your forefoot gives you the added leverage necessary to keep you from falling on your face if your center of gravity were to shift forward. Those luxurious heels of yours keeps you from falling on your backsides if your weight were to suddenly shift back.
Now, take a look at your hands which are also not too shabby in their design. They have the ability to produce and transmit high amounts of strength, but at the same time are dexterous enough to perform fine motor movements like playing instruments or texting at mind boggling speeds. There seem to be infinite skills that we humans can do with our hands; however, one thing that they are not inherently great at is balancing on.
It’s not that the hands are lazier than your feet; it just simply comes down to the anatomical differences and functions between them. The palm, which is your main stabilizing structure, is small in comparison to the long lever of your foot. Remember the importance of your heel in helping with balance adjustments? Your palm does not have the same luxury of such a helper. Additionally, if you began to fall towards your back or “over balance”, you must rely heavily on those fingers and the musculature that runs through the hands and forearms in order to keep you from crashing onto your back or falling directly on your head. There is a major difference between relying on the bony structure of your feet to effortlessly keep you upright, versus the muscular effort that is required to keep your entire body balanced on top of those little hands.
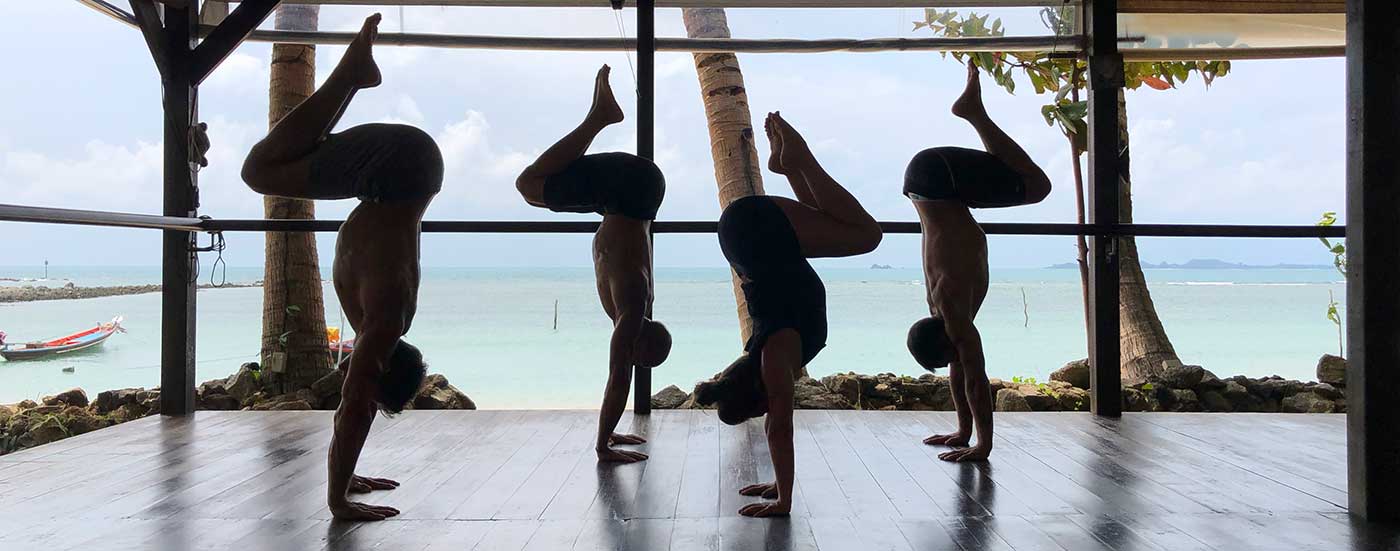
AF Master Instructors Rich Scrivener, Chris Flores, Alisha Smith, and Sascha Mueller practice their Tuck Balances in Thailand.
Biology of balance
As you’re walking about your day, you’re most likely unaware that there are three subsystems within your body that are working brilliantly to keep you from falling down. This group of finely orchestrated systems is referred to collectively as the Human Balance System.
In an attempt to keep this short, sweet and simple, here’s the quick explanation:
The human balance system is made up of three subsystems:
- Ocular System — consisting of the eye and its central visual system (ie what we see)
- Vestibular System — the parts of the inner ear and brain that help control balance and eye movement
- Proprioceptive System– located in our muscles and joints, it provides us with a sense of body awareness and detects/controls forces and pressure (ie our sense of self in our environment)
These systems have spent most of your lifetime working in a vertical orientation (ie upright). They’ve adapted to sensing, seeing, and navigating in a world where your head is stacked on top of your ribcage, pelvis, and feet.
Now just think for a moment how disorienting it must be for your Human Balance System when you turn your entire body upside down. All of these systems must now recalibrate and learn to communicate with each other in a completely different way. Lucky for you, the body is an adaptation machine, so it can learn but it’s going to take some time and some clever strategies.
Create a strategy
If you ever find yourself in one of our L2 Animal Flow workshops, you’ll hear us talk about the five things that will slow down or mitigate the success of one’s hand balancing journey. These include:
- Fear — by far the most common deterrent for becoming successful at hand balancing is fear. And for good reason. Your body knows just how important your brain is for your survival, which also means you have innate self defense mechanisms that try to keep you from breaking the thing that holds your brain (aka the skull). A good dose of fear is healthy, but if we address the next four things, we can most likely begin to turn down some of those fear messages and start to turn up our Tuck Balance success rate.
- Requisite Joint ROM — Range of Motion is the extent of movement of a joint, measured in degrees. Yes, this can sound a bit “sciency” but it can be simplified by asking yourself a question: Do you have enough ROM at the necessary joints in order to do the thing that you want to do? Well, if hand balancing is what you want to do, then you’re going to need about 90 degrees of wrist extension and about 180 degrees of shoulder flexion.
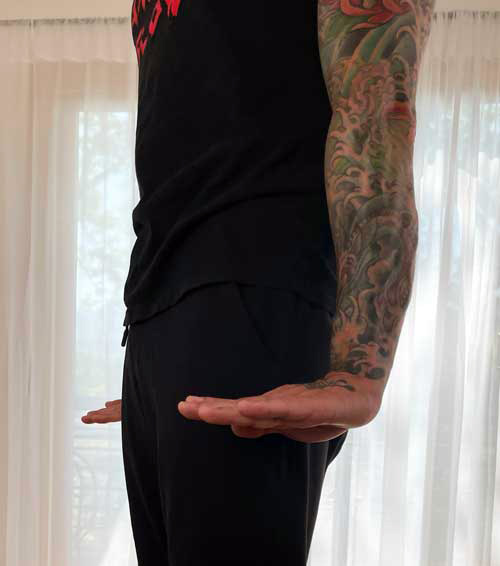
90 degrees of wrist extension
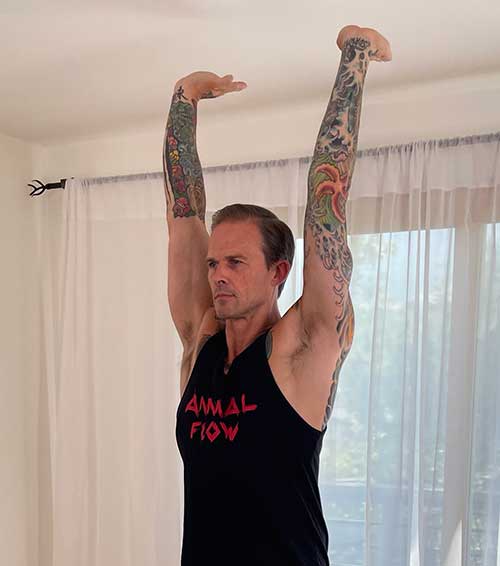
180 degrees of shoulder extension
- Structural Integrity — structural integrity and ROM go hand in hand. You may have the range of motion to bring your arms directly overhead, but if you don’t have the stability in your shoulder joints (and arms) to hold your entire bodyweight up once you are upside down, then your attempts could lead to disaster. Keep in mind that flexibility does not mean control or stability. This is exactly why conditioning is such a huge part of hand balance training. One of my all-time favourite conditioning basics to develop structural integrity is the Floor Pike Drill described below.
- Proper progressions — I can’t emphasize the importance of proper progressions enough. Typically, when most people want to learn to balance on their hands, they just repeatedly kick themselves up against a wall, hoping to eventually find that perfect balance point. I have to admit that I was guilty of this as well when I first began. If I had known to first check my requisite ROM, build more structural integrity using conditioning drills and use a series of proper progressions, I would’ve saved myself a lot of time!
- Time and consistency — hand balancing is a serious skill. It’s also something I like to refer to as an elusive art. One day you may feel like you have it and the next day it’s like you’ve never been on your hands before. And ironically, on those days, the more you chase it the further it flies away from you. Just to put things into perspective, it typically takes a toddler about 9-15 months to learn to walk on their feet. So, the next time you’re wondering why you don’t have a perfect Tuck Balance, after only a month of practice, just read the beginning of this article again. Time and consistency truly are the “secret” to a successful hand balancing journey.
Try These Drills
If you are interested in beginning a hand balance or tuck balance journey, try these three conditioning drills. These drills are focused on building the structural integrity (stability) to eventually stand on your hands. Be sure to build your way up to 90-120 second holds before moving on to the next progression. Keep in mind that it may take weeks or even months before you have built enough endurance to progress from one variation to the next.
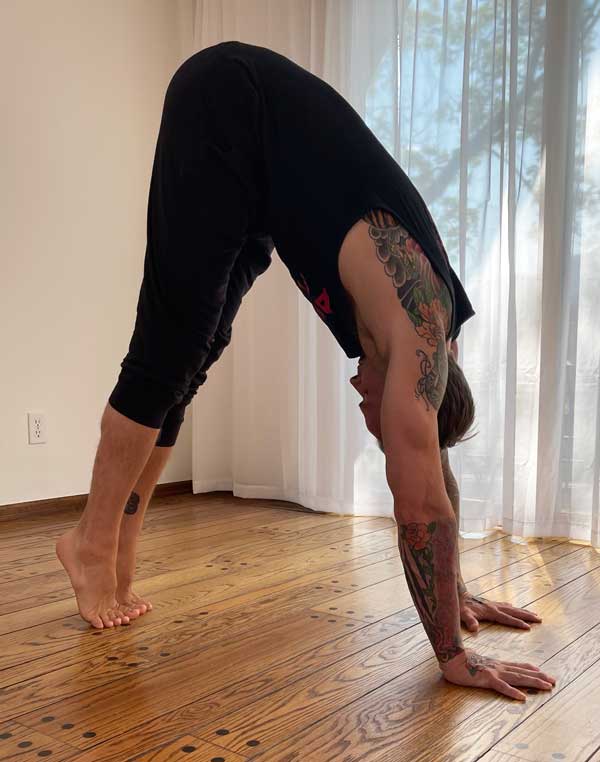
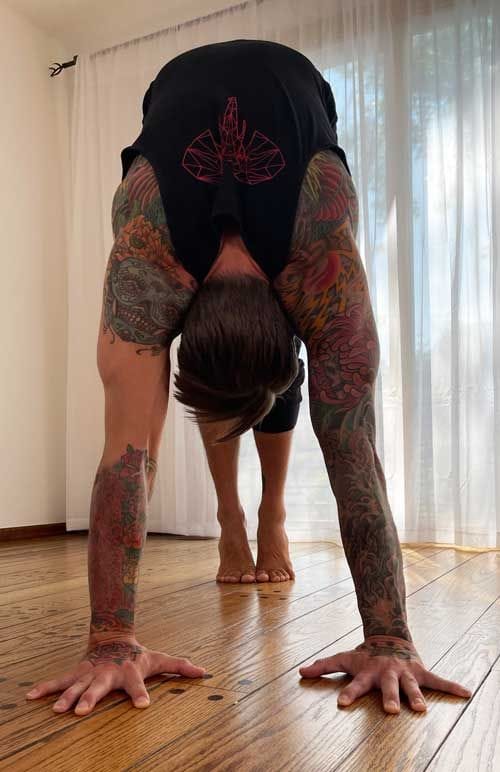
Floor Pike – Conditioning Drill
Start with your hands shoulder width and your knees on the ground, underneath your hips. Push the hips up towards the sky as you bring your head between your arms. Be sure to drive through the balls of your feet, keeping your heels high off of the ground.
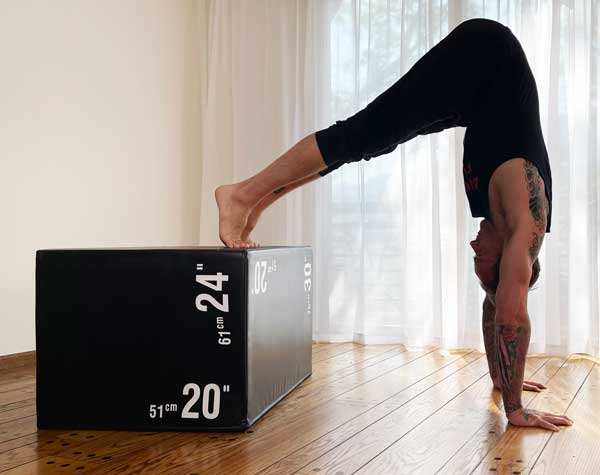
Pike 90 – Conditioning Drill
Find a sturdy object that’s roughly chair height. Place your hands on the ground in a shoulder width distance and place your feet on the support. Staying on the balls of your feet, push your hips up towards the sky. Be sure that the hips are stacked directly over the shoulders.
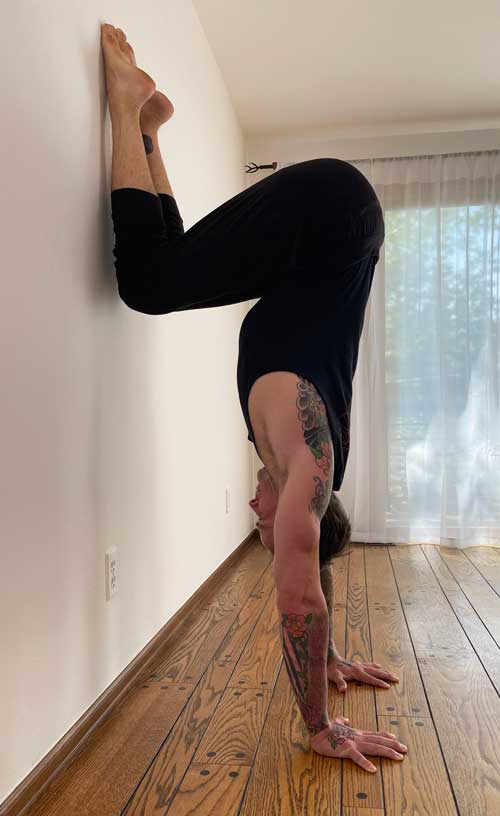
Wall Assisted Tuck – Conditioning Drill
Place your hands on the floor and begin to walk your feet up the wall. Once the legs are fully extended, walk the hands towards the wall until they are roughly 1.5 to 2 feet away from the wall. Slide the tops of the feet down the wall until the knees are at hip level or slightly below.
Conditioning Tip
In all variations, be sure to shrug the shoulders towards the ears and keep the eyes focused back towards the feet, object or wall.
If you’d like more detailed guidance, we have a Tuck Balance Tutorial Series on our Animal Flow On Demand channel which comes with a 14-day free trial.